
Express is the quick, DIY method of screening! This is what you’ll use whenever submitting a file of fewer than 500,000 records at a time (unless it requires special processing, like NCOA or WE Locate). You can do one Express screening or you can do many! Express files are processed directly by the computer, so that means they’re pretty quick. You’ll usually get your results back within a few hours.
Larger files, or those that need additional processing, should be submitted through the Batch Upload.
- Note: If your subscription includes integration between your CRM/D and WealthEngine (e.g. the Salesforce Connector), you may be able to submit your screening there, rather than doing a manual upload in Express. Make sure to check out our Integrations Section for more information and how-to guides.
Step 1: Log into your WE account.
Step 2: Click on the "Screen" tab at the top of the page.

This will automatically take you to a list of the screenings that you have already completed.

- Note: This default view also has buttons that you can use to easily analyze the screening or use it to build a look-alike model. Clicking on the name of the screening will take you to the My Profiles section.
Step 3: Click "New Screen".

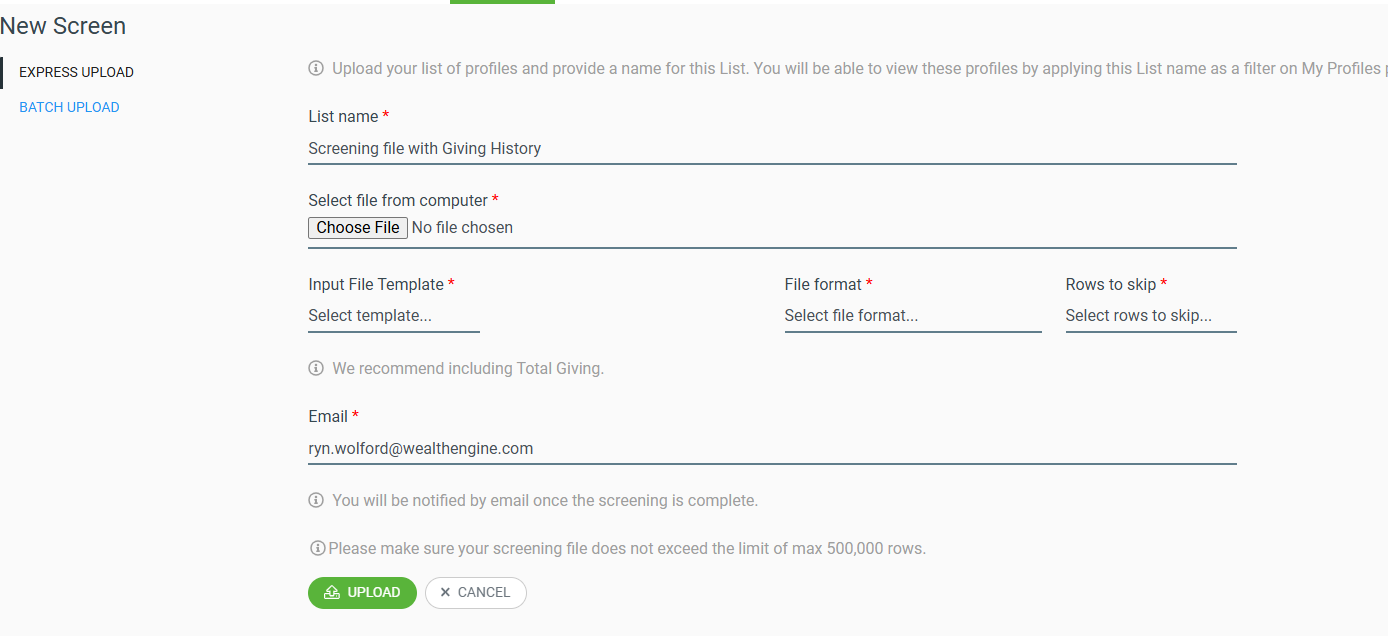
This will pull you to the Express Upload page, where you can send in your screening file:
Step 4: Choose the template.
An Express screening is processed entirely by the computer, which means your file must fit an exact template in order for the system to read it. In other words, if you rearrange, delete, or rename any of the columns, it won’t go through.
We have two standard options you can choose between: Basic and Detailed.
- Note: You may get better results with Detailed. For more information, check out our guide for Screening Best Practices!
Substep 1: Go to Input File Template and click to open the drop-down menu.
Substep 2: Once you select a template, the Template Details button will appear. Click.

Substep 3: The page that opens up will give you a comprehensive overview of the template.
Substep 4: If you scroll to the very bottom, you can download it in Excel.
However, if you can’t fit your data into either Basic or Detailed, then you can instead create your own template! You’ll decide which fields are included, as well as their order.
- Note: For instructions, see our Custom Import Template Guide.
Step 4: Prepare your file.
Enter your data into your chosen template. The minimum required fields for every record are always the first name; last name; street address; city; state; and zip.
Step 5: Fill out the fields in Express Upload.
Substep 1: Folder Name is what your results will be labeled in the My Profiles section. It defaults to your username + the date, but you can change it.
Substep 2: Select your file.
Substep 3: Specify which template you used.

Substep 4: Choose the file format.
Substep 5: Specify the number of header rows the computer needs to skip before it counts your first person.
- Note: e.g. if your file has one row listing the column names, choose “1”.
Substep 6: Enter your email to get an update when your results are in.

Step 6: Review.
Once you click Next, you’ll be brought to a Review Page where you can verify your selections.

Step 7: Upload.
You should immediately get a Congratulations Page. If there’s an error, contact our Customer Support team.
When your results are in they’ll automatically pop up in your My Profiles section.